
Often, Windows servers are needed for various purposes – setting up a game server, installing software like TeamSpeak, or running specific applications (Zenoposter and Zenodroid in my case).
Windows servers require more computational power than Linux servers and are therefore more expensive by default. Typically, you’d need at least 1-2 cores, 2GB of RAM, and a minimum of 40-50GB of storage. And this is significantly more expensive than the usual 5 euros.
Furthermore, many providers only offer licensed Windows, and cloud providers often charge extra for it. Some providers may not even offer the option to install Windows through their control panel.
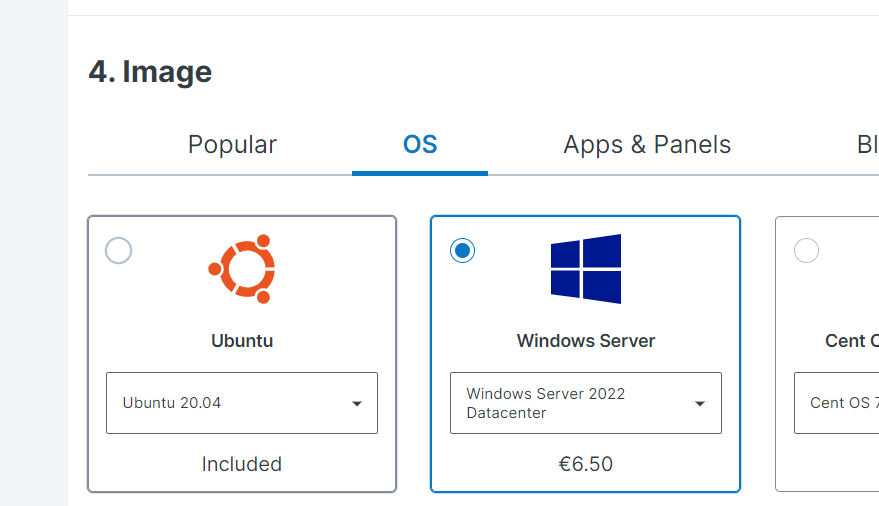
By the way, take a look at my list of cheapest/low cost VPS/VDS for installing Windows.
So what we can to do?
Today, I’ll explain how to install your own Windows on any VPS.
Step 1
From panel booting to sysrecue mode. In my hosting, it looks like this:
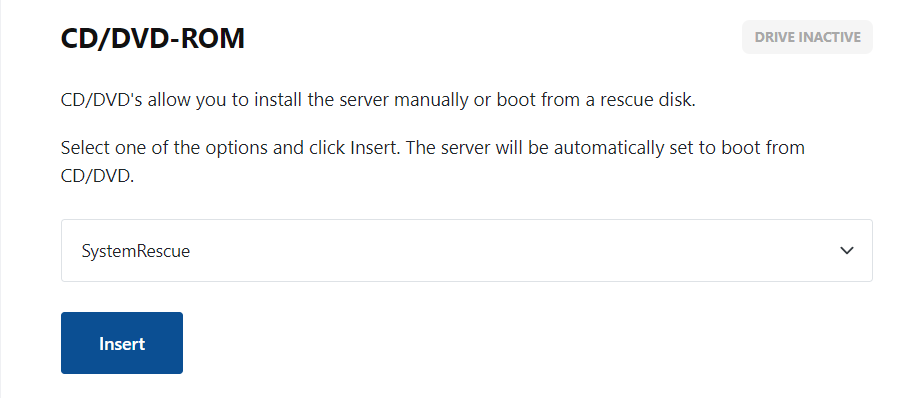
In my case, it was an image based on Archlinux, and previously I used Debian live 10 (if it’s Contabo). The principle is the same, with details differing. So, we selected the image, and then connected to the server via VNC (I recommend using UltraVNC Viewer for this).
The VNC login details will either be sent to your email or you need to enable them in the server settings (in the provider’s control panel).

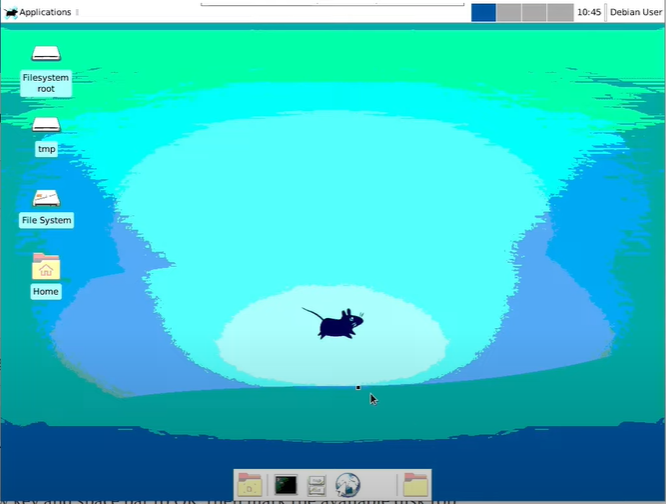
After connecting to VNC, if the graphical interface doesn’t load, enter ‘startx’ to launch the graphical interface.
In my case, the server was not connected to the network. To fix this, you had to open the hoster panel with network settings

Click on the network icon in the corner. Choose the connection showing the error. Disable DHCP and manually specify the network settings.
This completes the first step. You great =)
STEP 2
Open CMD and type:
sudo su

apt update
Also find out what kernel the boot image is based on (command “hostnamectl”)
If it’s Archlinux, then use “pacman -S” to install packages, if debian, than “apt”, etc.
After updating, lets install packages
apt install gparted filezilla grub2 wimtools -yor in my case
pacman -S gparted filezilla grub2 wimtoolsIf errors occur during operation, manually check that all necessary packages are installed/installed (try running and then closing the commands gparted, grub-install, rsync, wimlib-imagex). If everything is okay, then proceed.
Launch gparted
gpartedIf MBR is missing, create it (Partition – Create MBR – dos). If there are any partitions on the hard drive, delete them to make the disk completely unallocated. After that, ensure that unallocated space is at the beginning, and create two partitions of 15GB each at the end (in ntfs). Refer to the screenshot
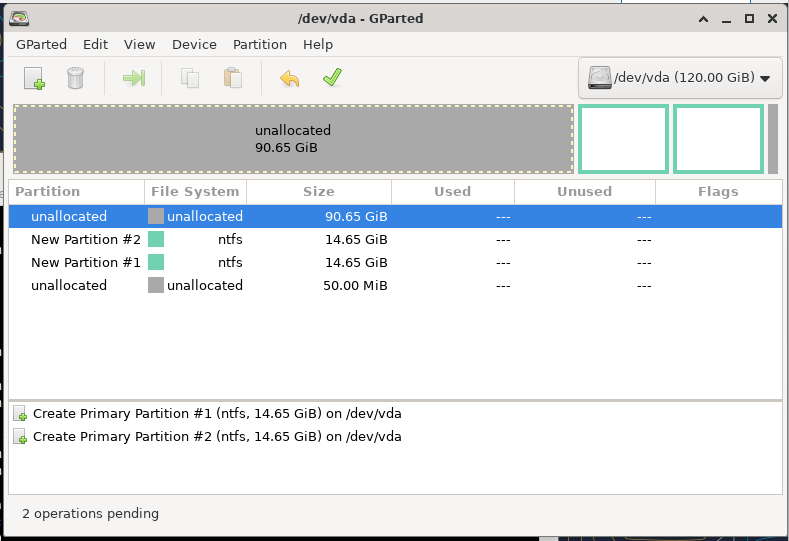
After this confirm chanes (green checkmark at the top). Also remember your HD device(in my case it’s /dev/vda, but it also can be /dev/sda).
After this you can close gparted and type in CMD
gdisk /dev/vda
r
g
p
w
Y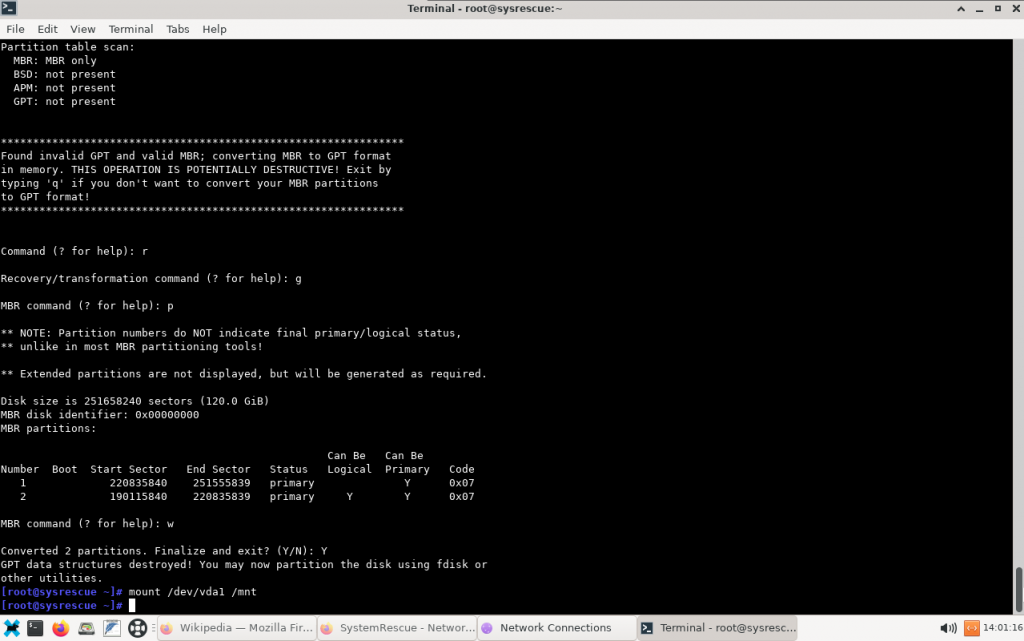
Good job!
Let’s prepare a little.
mount /dev/vda1 /mnt
cd ~
mkdir wd
mount /dev/vda2 wd
grub-install --root-directory=/mnt /dev/vda
cd /mnt/boot/grub
If, for some reason, the clipboard in my VNC isn’t working (although it should), then enter everything manually, checking carefully for errors
Now we create a grub and write it into
nano grub.cfg
menuentry "Windows installer" {
insmod ntfs
search --set=root --file= /bootmgr
ntldr /bootmgr
boot
}
Check it twice!
Save by click Ctrl+X, Y, Enter.
cd /root/wd
mkdir wf
Now we need an ISO image of Windows. You can take it from the official website; download it from a torrent by aria2c; or download it from your other server(of file-sharing service) or use ISO from internt (unsafe).
For example we download it from internet. To avoid typing long links manually, you can use a link shortener, for example bit.ly.
wget -O win.iso https://url.com/qwerttythe do this
mount -o loop win.iso wf
rsync -avz --progress wf/* /mnt
umount wf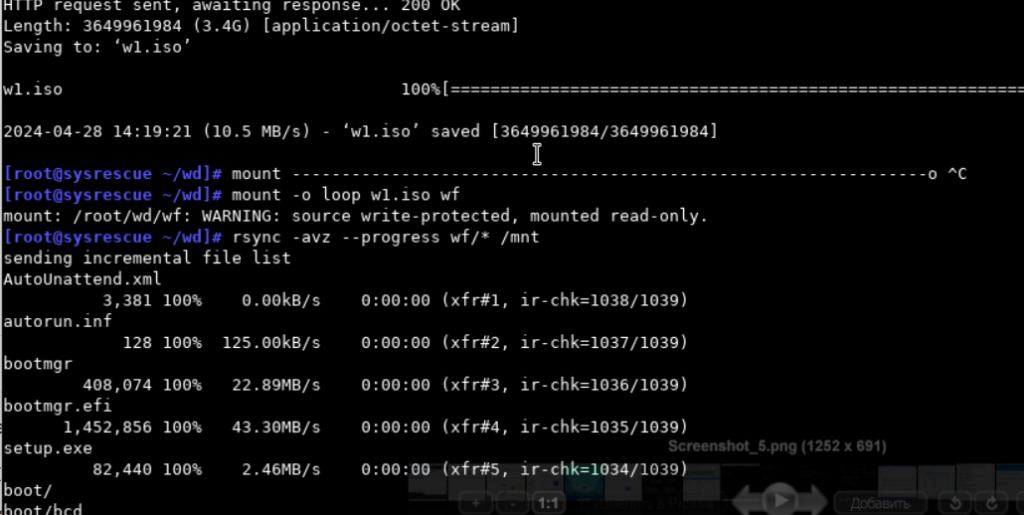
Now we need to install VirtIO drivers.
Open official site https://fedorapeople.org/groups/virt/virtio-win/direct-downloads/archive-virtio/virtio-win-0.1.248-1/
Copy url to ISO, insert it into bit.ly and take your url. For example https://bit.ly/vir123
Let’s to the same
wget -O vt.iso https://bit.ly/vir123
mount -o loop vt.iso wf
mkdir /mnt/sources/virtio
rsync -avz --progress wf/* /mnt/sources/virtio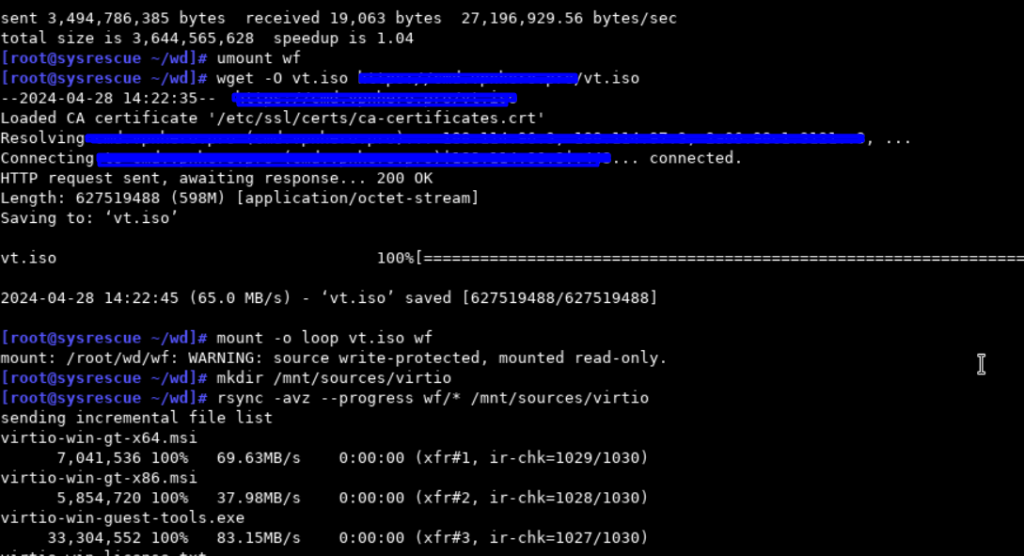
Now you need to make sure that adding drivers are available during Windows installation.
cd /mnt/sources
touch cmd.txt
echo 'add virtio /virtio_drivers' >> cmd.txt
wimlib-imagex update boot.wim 2 < cmd.txt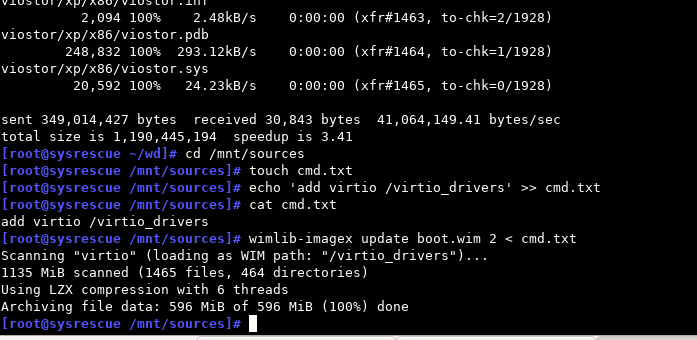
Thats all!
Disable the cd/dvd boot disk if you have it enabled and switch the boot to the hard drive in the hoster panel
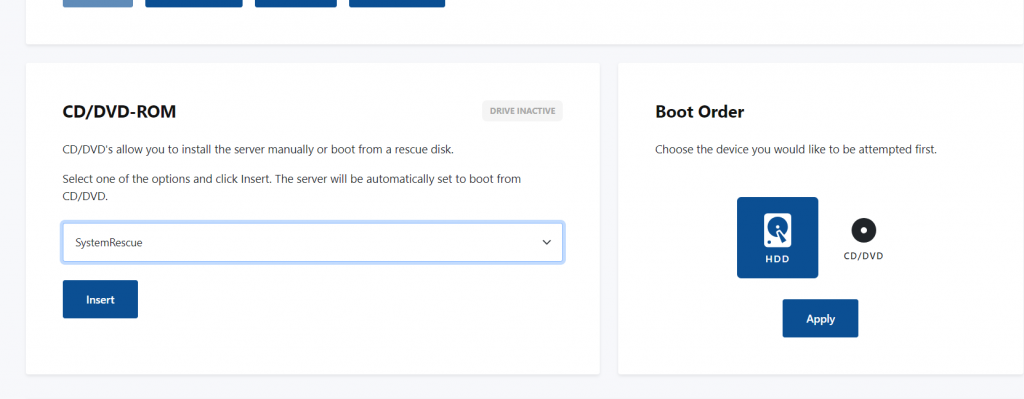
Now reboot.
STEP 3
Windows installation will begin and you’ll see error
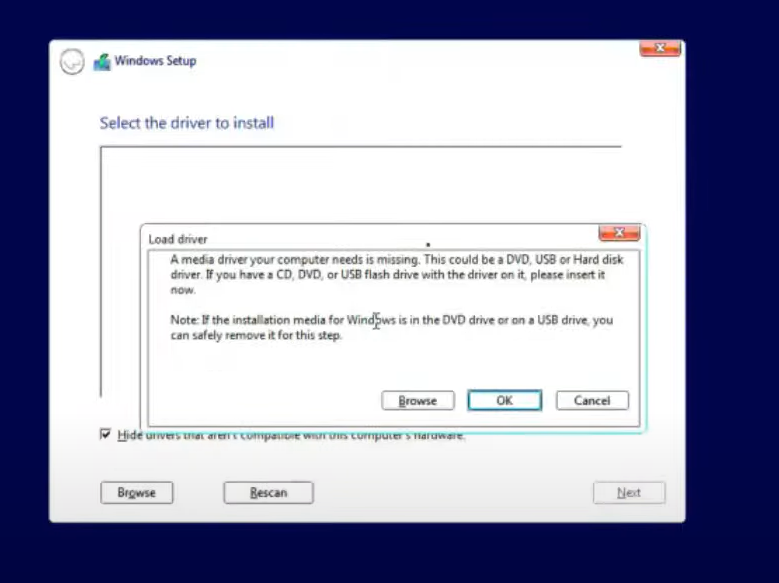
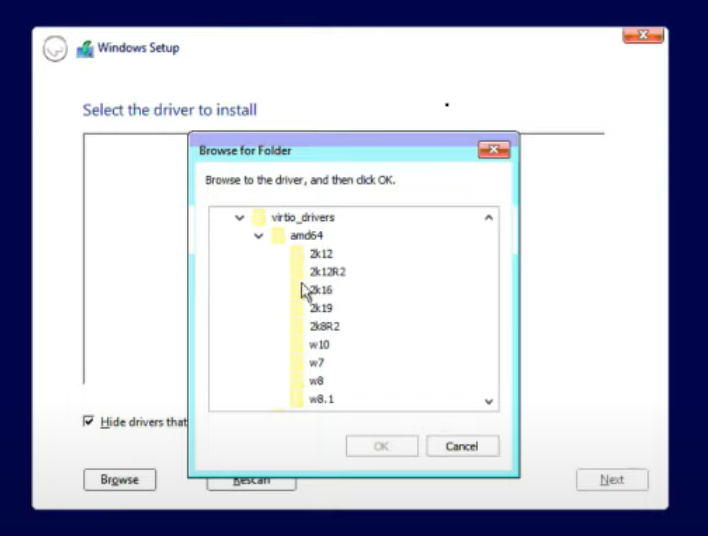
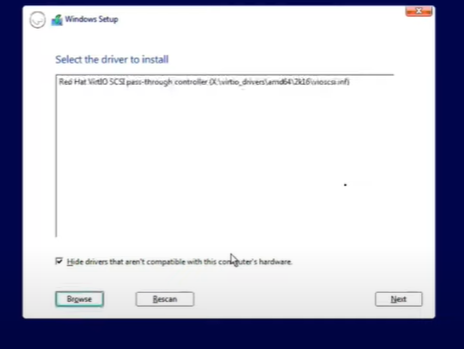
Ok. Browse – boot – virtio_drivers – amd64 – your OS(w10 in my case) – ok.
install
After loading the Windows desktop, in order for you to have Internet access, you need to open the device manager – other devices – Ethernet – install the driver – select (boot – virtio_drivers – amd64) – install.
If the network does not connect automatically, then manually disable the DHSP in the connection settings and specify the network settings (as we did earlier in Linux).
Thats all. Enjoy!